

Microsoft Copilot draws a flange plate in AutoCAD
Copilot Studio and Teams drive AutoCAD on a local PC through SphereHarness: layers, dimensions, a delete and the three set-up steps.

The video plays from YouTube’s privacy-enhanced player only after you click it.
Microsoft Copilot, working in Copilot Studio, drew a DN80 flange plate in AutoCAD on a local PC through SphereHarness: layers, a border, a title and dimensions, then a clean-up with a delete. The agent counted the objects each time: 12 on OUTLINE and 3 on CENTER at first, then 12, 3 and 8 after the dimensions were added and the extra title removed.
What was asked
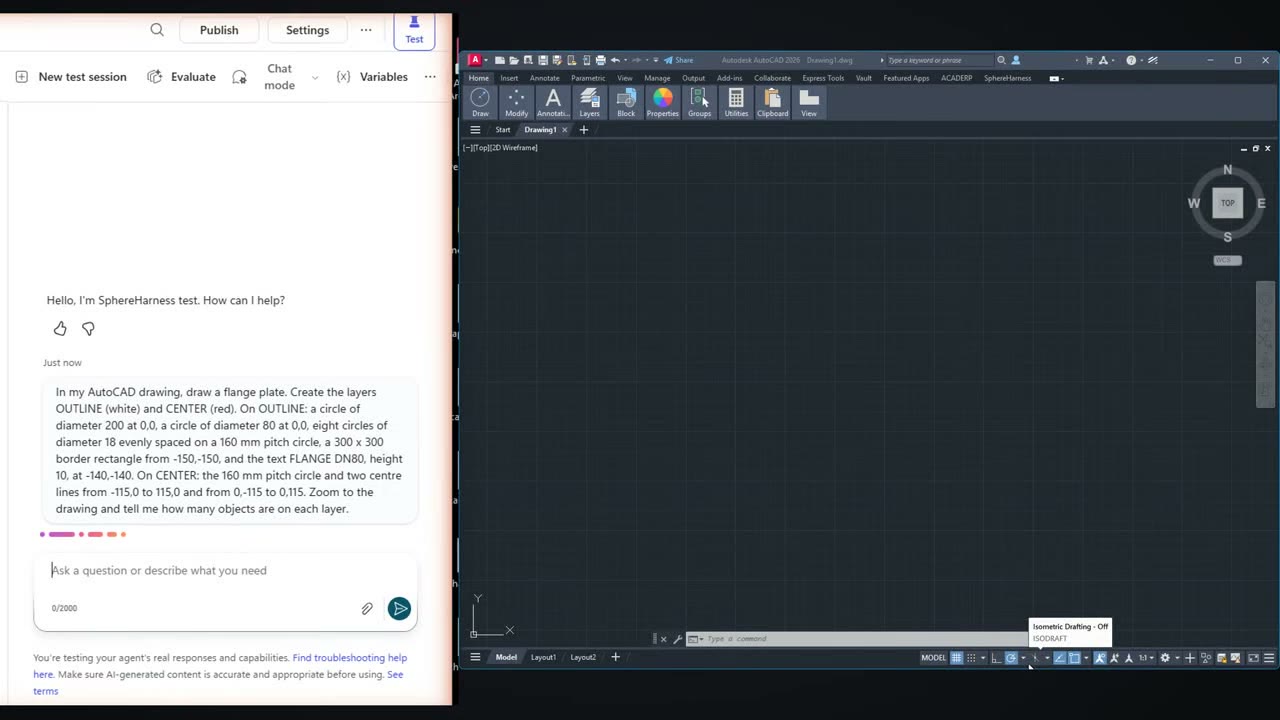
The request was typed in the Copilot Studio test pane: "In my AutoCAD drawing, draw a flange plate. Create the layers OUTLINE (white) and CENTER (red). On OUTLINE: a circle of diameter 200 at 0,0, a circle of diameter 80 at 0,0, eight circles of diameter 18 evenly spaced on a 160 mm pitch circle, a 300 x 300 border rectangle from -150,-150, and the text FLANGE DN80, height 10, at -140,-140. On CENTER: the 160 mm pitch circle and two centre lines from -115,0 to 115,0 and from 0,-115 to 0,115. Zoom to the drawing and tell me how many objects are on each layer."
What the agent did
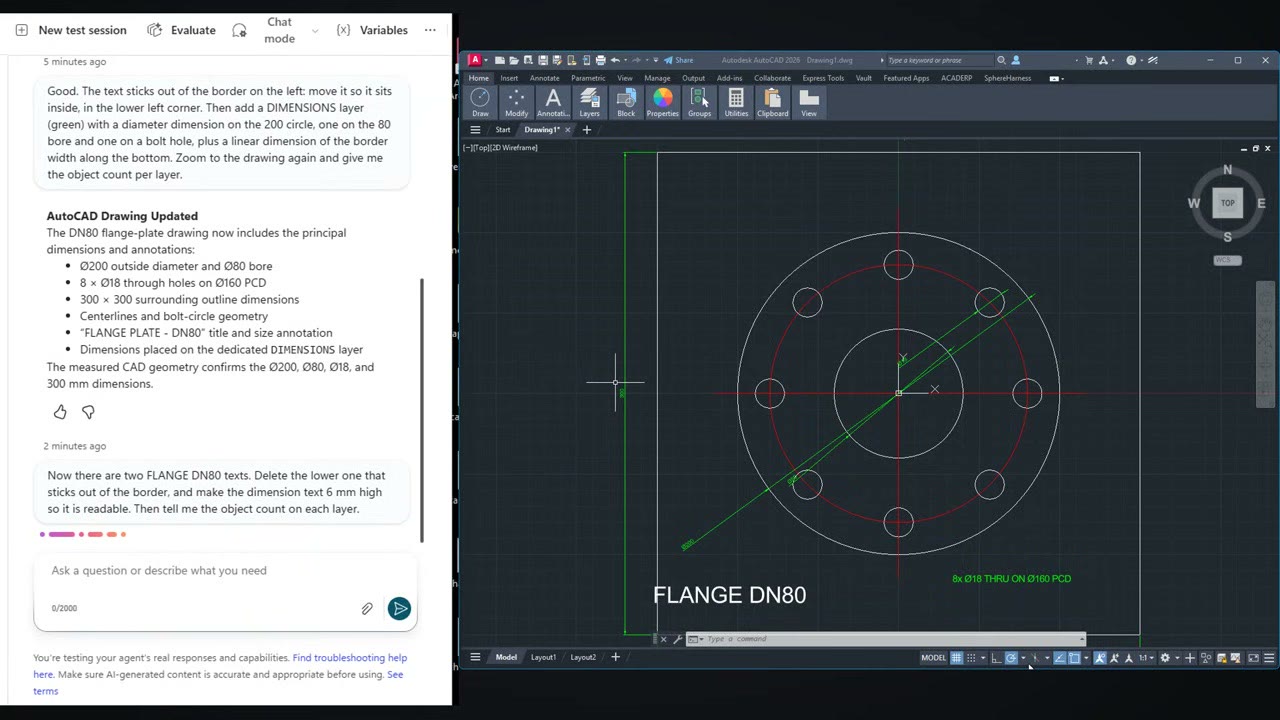
Copilot created the layers and the objects, zoomed to the drawing and counted them. The next request added a green DIMENSIONS layer with diameter dimensions on the 200 circle, the 80 bore and a bolt hole, plus a linear dimension of the border width along the bottom.
What did not work
The title came out wrong. Copilot copied the text instead of moving it, so the drawing had two FLANGE DN80 titles and one stuck out of the border. The next request fixed it: "Now there are two FLANGE DN80 texts. Delete the lower one that sticks out of the border, and make the dimension text 6 mm high so it is readable. Then tell me the object count on each layer."
That works because Copilot can run every operation the desktop agent can, deletes included. The recount showed 12, 3 and 8 objects, and nothing left on layer 0.
Copilot in Teams
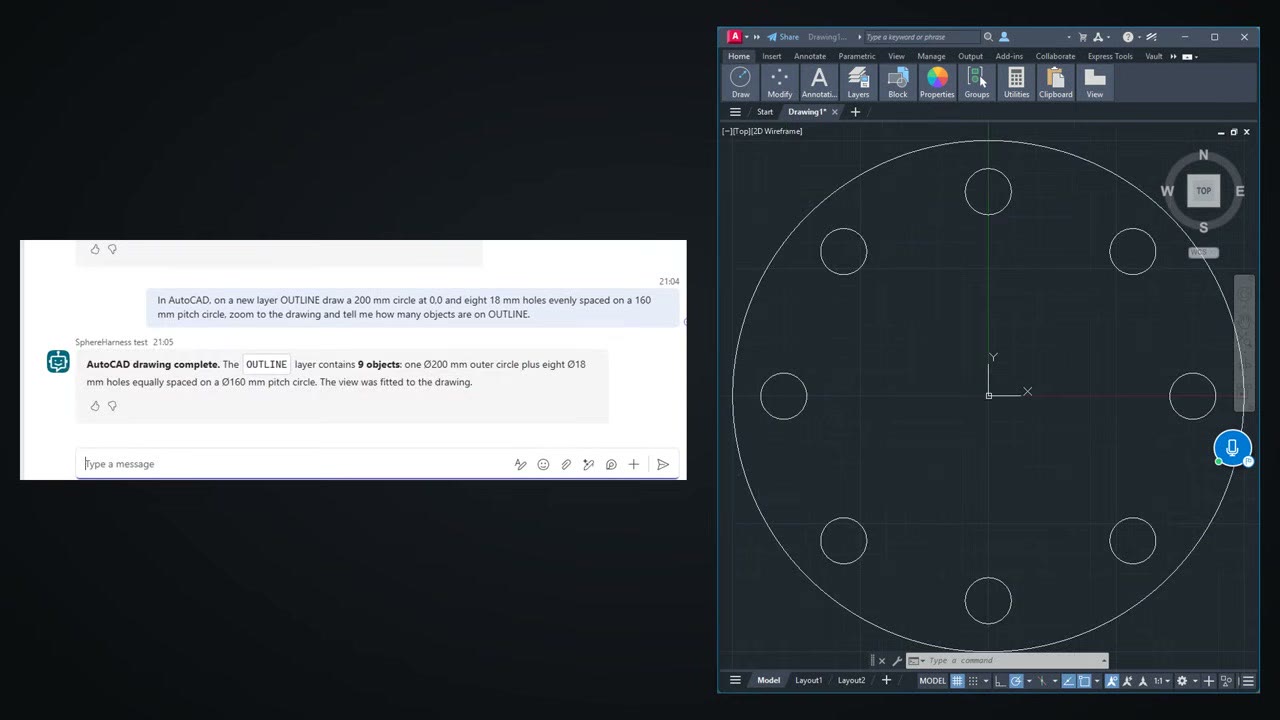
The same Copilot agent is published to Microsoft Teams. The message there was: "In AutoCAD, on a new layer OUTLINE draw a 200 mm circle at 0,0 and eight 18 mm holes evenly spaced on a 160 mm pitch circle, zoom to the drawing and tell me how many objects are on OUTLINE." AutoCAD drew it on the PC and Teams answered 9 objects on OUTLINE: one 200 mm outer circle plus eight 18 mm holes.
Set-up
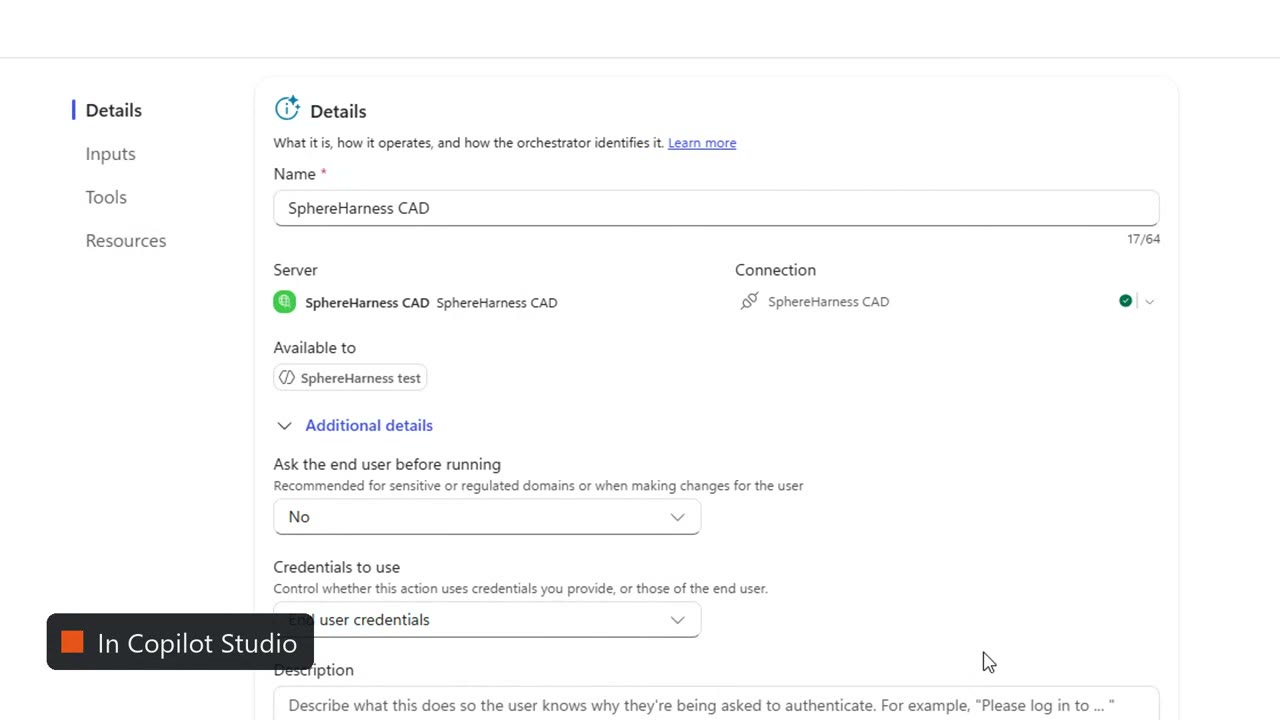
There are three steps. On the PC, open Channels in the SphereHarness desktop agent and switch on Microsoft Copilot via SphereHarness. In Copilot Studio, add SphereHarness to the agent as a model context protocol tool with OAuth sign-in, and keep the credentials on end-user credentials so every person signs in with their own SphereHarness account.
Then tick "I accept" and choose Allow on the sign-in page, and accept once on the PC the first time Copilot reaches it. The written guide is at /help/channels-copilot.
Try it yourself
SphereHarness for AutoCAD is described at /autocad, and /help/getting-started walks through the first install and the first request.