

Siemens NX
SphereHarness drives Siemens NX through an add-in. Describe what you want in plain language in the desktop agent's chat and SphereHarness carries out the work in your open part — sketches, features, drafting, assemblies, sheet metal and layers — reporting each step as it goes. With Teamcenter, it works on items and revisions instead of files.
Supported NX releases
The NX installer 1.2.2.0 carries a build for each of these NX releases:
- NX 2306
- NX 2412
- NX 2506
- Designcenter NX 2512
(The NX installer 1.2.1.0 carried NX 2306 and NX 2412 only.)
One installer covers all of them. The add-in has to be built separately for each NX release, so the installer holds one build per release, side by side. Every time NX starts, SphereHarness checks which NX release is running and loads the build made for it. Several NX releases on one PC are fine — each gets its own build — and a new NX release installed later needs nothing from you as long as the installer has a build for it.
If your NX release has no build
NX starts and works normally, but SphereHarness is not loaded in it, so the desktop agent cannot reach that NX session. NX writes one line to its own log file (the syslog), for example:
NX 2206 and older, NX 2312 and NX 2406 have no build in the current installer. Take the newest NX installer from Downloads; if your release is still not covered, open a support request. The same log carries the one sentence SphereHarness writes when something else stops it loading — for example a missing .NET 8 Desktop Runtime (x64).
Installation
Close NX, run the NX installer (it needs administrator rights), then start NX again so it loads the add-in. See Installing SphereHarness for what else the installer carries.
- The installer registers SphereHarness with every NX release on the PC at once, through NX's own list of customer directories. A list your site already uses is kept and read first — the installer adds to it rather than replacing it, and uninstalling puts your original setting back.
- No NX Open author licence is needed to run the add-in. The parts of SphereHarness that NX itself checks carry Siemens NX Open signatures, so NX accepts them on any licensed seat. Journals and .NET assemblies of your own are a different matter — see Automation Hub.
UGII_CUSTOM_DIRECTORY_FILE (a Windows user environment variable) hides the machine-wide one, and then SphereHarness does not load for that user. Remove the user variable, or add this line to the file it names: #include C:\ProgramData\SphereHarness\NX\custom_dirs.datWhere to find SphereHarness
The SphereHarness ribbon tab holds Part from Drawing/PDF/Image, Part from Mesh, Drawing from Reference, Refeature Solid, Macros, Variations, Connection: Stop / Restart, Reconnect to Desktop Agent, Open Desktop Agent, Settings, Usage Stats and Help. You chat in the desktop agent; Open Desktop Agent brings it up.

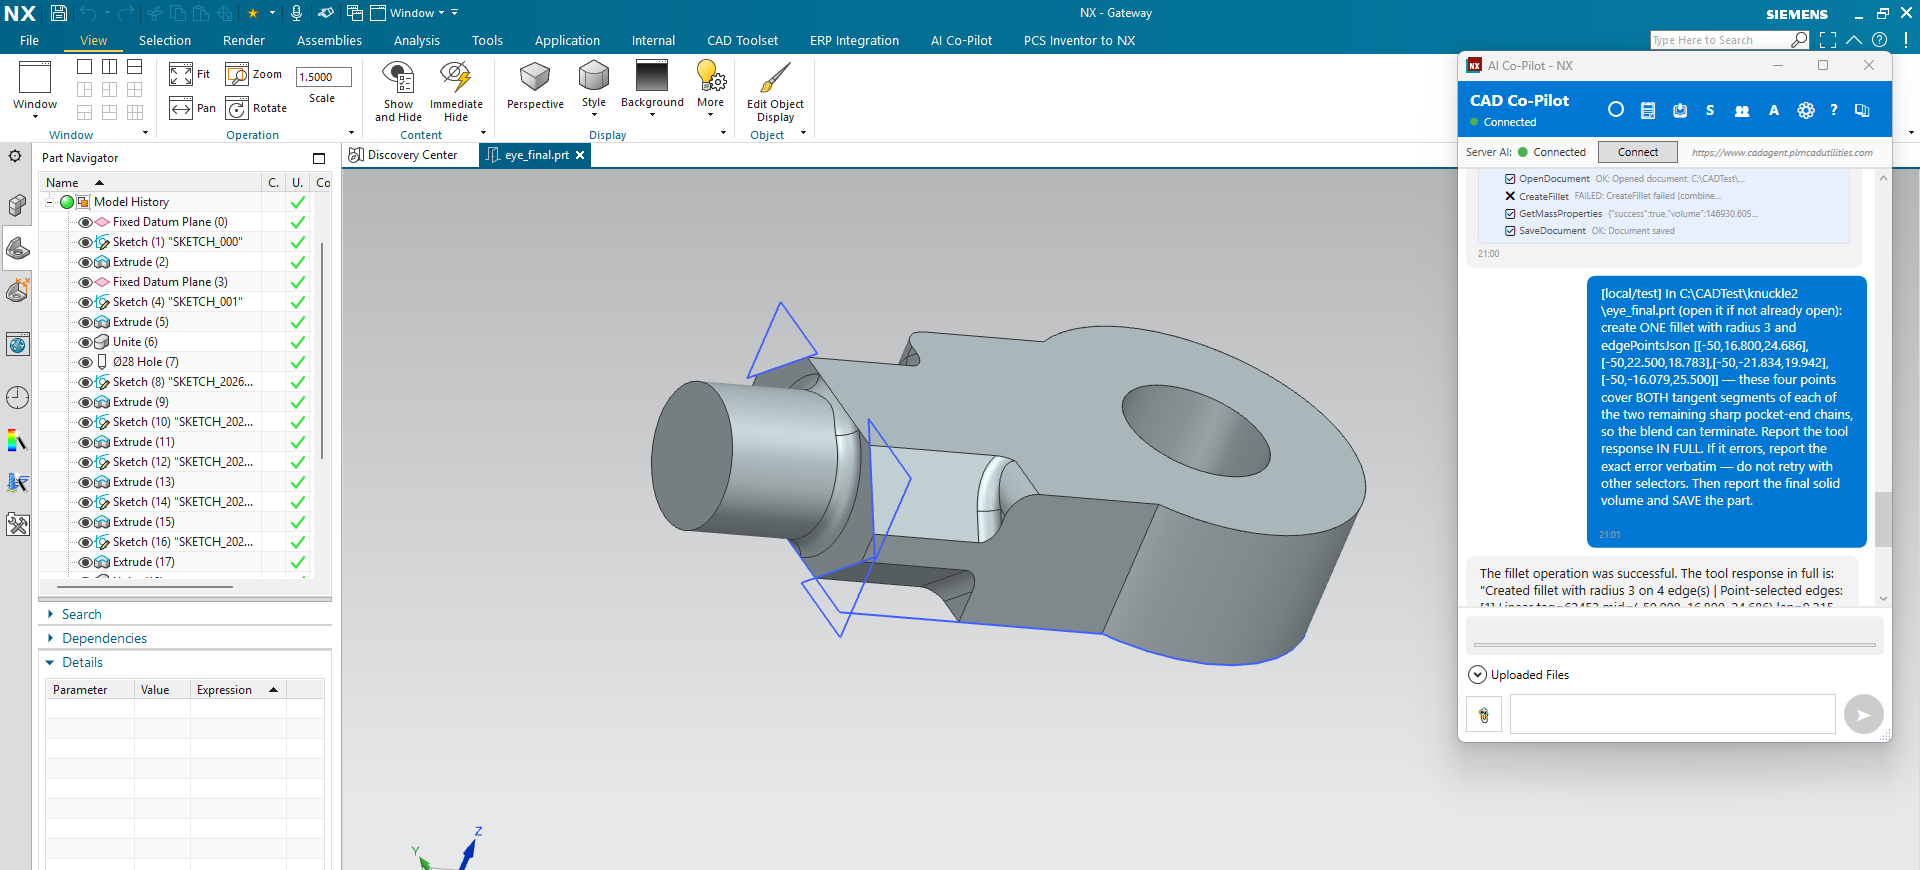
Your first prompts
Then move on to the worked examples in Part Modeling.
Three NX-specific habits
All geometry is in 3D world coordinates — including sketch curves. When you give a point for a sketch entity in NX, give the full world X, Y and Z. This is a genuine difference from the other three systems, where sketch coordinates are 2D and local to the sketch plane.
Set the work part before you edit. NX distinguishes the work part (what you are editing) from the displayed part (what you are looking at). If an edit lands somewhere unexpected, ask which is which.
Switch environment explicitly. NX has separate Modeling, Drafting, Sheet Metal and Gateway environments. Ask SphereHarness to switch, and it reads back the environment that actually became active.
What SphereHarness can do in NX
- Modelling — sketches, extrude, revolve, sweep, loft, fillet (blend), chamfer, hole, thread, shell, draft, boolean, split, patterns, mirrors, datum planes, axes, points and coordinate systems. See Part Modeling.
- Surfaces — offset, extend, trim, thicken, planar surface.
- Sheet metal — base flange (tab), edge and contour flanges, bends, hems, jogs, corner breaks, flat pattern and DXF export.
- Assemblies — add components, constraints, replace, ground, suppress, exploded views, BOM export and import, interference checks, cloning. See Assemblies.
- Drafting — sheets, views, dimensions with automatic value checking, notes, balloons, parts lists, centre marks, GD&T, weld and surface-finish symbols, plus layer control. See Drawings.
- Arrangements and part-family members — see below.
- Expressions — NX expressions are handled as parameters: list, read, create, change, import and export.
- Journals — record, run and store in the Automation Hub. See below.
Layers — an NX-only capability
Layer control from chat exists for NX and no other CAD system.
Arrangements and part families
An NX arrangement carries component position and suppression only. Dimension overrides on an arrangement are refused rather than silently ignored — use a part-family member for that.
NX has no per-variant custom-property scope. Properties belong to the part, not to the arrangement, so a BOM cannot vary a description by arrangement the way it can by an Inventor model state.
Journals
SphereHarness can start and stop NX journal recording, run existing journals, and store them in the Automation Hub with named parameters.
SphereHarness's own recorded macros are a different mechanism and work normally — see Macros.
Preferences
NX has the richest preference surface of the four systems, and SphereHarness can read and set all of it:
- Session preferences — Sketch, Modeling, Drafting, PMI, Assemblies and more.
- Part preferences — Modeling, Drafting, Work Plane and more.
- Customer defaults — at user, group or site level.
Simulation and Teamcenter
NX exposes Simcenter structural analysis (linear static and modal) and a bridge that exports an NX Nastran deck for an external solver, and Teamcenter / NX Manager for data management. Both depend on how your NX session is configured, so probe before you plan around them:
The desktop agent starts NX in Teamcenter mode by itself on a PC set up for Teamcenter; NX handles the Teamcenter sign-in. See Simulation & FEA for study setup, and NX and Teamcenter below.
NX and Teamcenter
When your NX session is running in managed mode, SphereHarness works against Teamcenter rather than against a folder of files: parts are items and revisions, and the file you would have saved is a dataset on the item.
Which Teamcenter
According to Siemens' Teamcenter Integrations Availability Matrix (24 April 2026), Teamcenter 14.3 supports all four releases — NX 2306, NX 2412, NX 2506 and Designcenter NX 2512 — in managed mode. The Teamcenter capabilities on this page were verified with NX 2306 on Teamcenter 14.3.
The agent starts NX in Teamcenter (managed) mode
When the desktop agent starts NX for you — you ask for NX and none is running, or you choose to launch it — it decides whether to start it managed (connected to Teamcenter) or native (plain files). The desktop agent setting NX: Teamcenter mode (NxTeamcenter.Mode) decides:
| Mode | What the agent does |
|---|---|
| Auto (the default) | Managed when this PC is set up for Teamcenter — the Teamcenter client's 2-tier environment is on the PC, or TC_ROOT / FMS_HOME are set. On a PC with no Teamcenter, NX starts exactly as it always did. |
| Managed | Always managed. If something it needs cannot be found it refuses and names what is missing, rather than quietly starting NX without Teamcenter. |
| Native | Always plain NX, never Teamcenter. |
The change applies to the next NX the agent starts. The Teamcenter folders (TC_ROOT, TC_DATA, FMS_HOME, TCCS_JAVA) are found on the PC by themselves; each can also be set explicitly in the desktop agent's settings when a PC has more than one Teamcenter installation. A leftover FMS_HOME from a removed Teamcenter is ignored.
After starting NX the agent tells you whether it came up connected to Teamcenter — it checks that NX really started its Teamcenter server and logged its Teamcenter integration, rather than assuming. NX handles the Teamcenter sign-in itself: SphereHarness never types your Teamcenter password and cannot sign you out — closing NX ends the session. An NX you started yourself is used as it is; if it is not managed, Teamcenter requests are refused with “Teamcenter / NX Manager is not active in this NX session.”
The NX working directory
Every NX the agent starts, managed or native, is started in a folder you can write to — by default %LOCALAPPDATA%\SphereHarness\NX\work. NX needs one: started in a read-only folder, it stops at the first Teamcenter part create or open with “No write access to current directory” and waits for someone to click. To use another folder, set NX: working directory in the desktop agent's settings, or ask the assistant; a folder that cannot be written is skipped with a note.
What you can do in Teamcenter today
- Create a new part as a Teamcenter item — with the id you give, or let Teamcenter number it — and choose its item type.
- Save to Teamcenter, and save as a new item.
- Open an item; with no revision given, the newest revision is opened.
- Search by item id (with
*wildcards) or by name, optionally limited to one item type. Searching by creation date is not available. - Revise to the next revision (your site's revision rule) or to a revision you name.
- Release status of an item revision — empty when it has not been released.
- Assemblies of managed parts, where-used and item properties.
- Datasets and relations, including non-master datasets, and UG Clone export and import from an Excel plan — both below.
- Not available: check-out / undo check-out. These are refused by name.
Every result is read back out of Teamcenter, not taken from NX's word for it.
Item type and relation on a new part
Creating a part in a managed session, you can say what kind of item it should be and how the new dataset attaches to it:
- Item type is the Teamcenter item type the new item is created as — whatever your site defines, most often Item.
- Relation says how the dataset hangs off the item revision:
- Master — the CAD master. This is the default and is what you get if you say nothing.
- Specification, Manifestation, Altrep — a non-master dataset on an item revision that already exists. These need a master item to attach to, so name it: the item and revision the new dataset belongs to.
Saving as a new item
Saving with no relation, or with Master, is the ordinary “save as new item” you already had. Saving with one of the other three relations puts the open part on the item you name as a non-master dataset instead of creating a new item of its own, and you may give the dataset its own name. Ask for the item's datasets back afterwards if you want to see the result rather than trust it:
Cloning assemblies out of and into Teamcenter
Cloning is the bulk operation: take an assembly out of Teamcenter as files (export), or bring a folder of files in as items (import), deciding per part what it is called, what item id and type it gets, and where it lands. You drive it with a spreadsheet, so a hundred parts are a plan somebody can review before anything happens.
The plan workbook
Sheet names and column headers are case-insensitive, unknown columns are ignored, and missing optional columns are fine. A .csv file with the Parts columns is accepted instead of a workbook.
Sheet Parts — one row per part:
| Column | What it is |
|---|---|
| Source | Exporting: the item and revision, ITEM/REV (@DB/ITEM/REV and a dataset name are accepted too). Importing: the path of the file on disk. A row with an empty Source is an error, reported by its row number, and nothing is cloned. |
| Action | What to do with this part: Clone, Retain, Exclude, Overwrite, UseExisting or NewRevision. An action the plan does not recognise is an error naming the row, and nothing is cloned. |
| ItemId | The item id to create. Leave it empty to let Teamcenter assign one — the assigned id comes back in the report. |
| Revision | The revision. |
| ItemType | The Teamcenter item type for this part. |
| Name | The item name. |
| Description | The item description. |
| Folder | The Teamcenter folder the item goes into. |
| FileName | Exporting: the file name to write for this part. |
Sheet Defaults — optional, two columns, a key and a value, one per row: Direction, TargetDirectory, DefaultItemType, DefaultFolder, NamingRule, IncludeDrawings, IncludeDependentParts, DryRun, LogFile.
What you say in the chat wins over the Defaults sheet, and the sheet wins over the built-in defaults. A part with no row of its own is named by the naming rule, given the default item type and the default folder, and cloned.
Naming the parts you did not name
NamingRule decides what happens to every part without a row:
- autotranslate — the automatic translation, and the default. Exporting, an item and revision become a file named from them (
000123/A→000123_A.prt); importing, a file becomes an item named after the file, at its first revision. - prefix:X or suffix:X — put
Xin front of, or after, the translated name. - replace:OLD=NEW — replace one piece of text in the name with another.
Dry run first, then the report
Always dry-run a plan before you run it. A dry run works the plan out and writes the report without creating, overwriting or exporting anything — it is how you find the row with the wrong item type while it is still cheap.
Either way you get a report workbook: the plan's own columns, then Target (what each part actually became — the file that was written, or the item that was created), Status and Error per row. Ids that Teamcenter generated for rows with a blank ItemId are in it, and so is the path of NX's own clone log.
Before any of this works
The NX session must be running in Teamcenter (managed) mode — the agent starts it that way on a PC set up for Teamcenter. Ask first if you are not sure:
Things that are not available on NX
- Trimming a body with a tool body, and face divide / delete / replace, are not implemented.
- BREP comparison between two parts is not available on NX.
- Coaxial and insert assembly constraints are not implemented as separate operations — use a concentric constraint, which is the reliable route.
- Native nesting — NX has no nesting API, so SphereHarness's own nesting engine does the layout from exported flat-pattern DXFs.
- Curve projection onto a surface and CAM setup / toolpath generation are not available in any CAD system yet. NX's own CAM module is unaffected — this is only about chat-driven CAM.